msab's Red Sea Reefer 450 Build

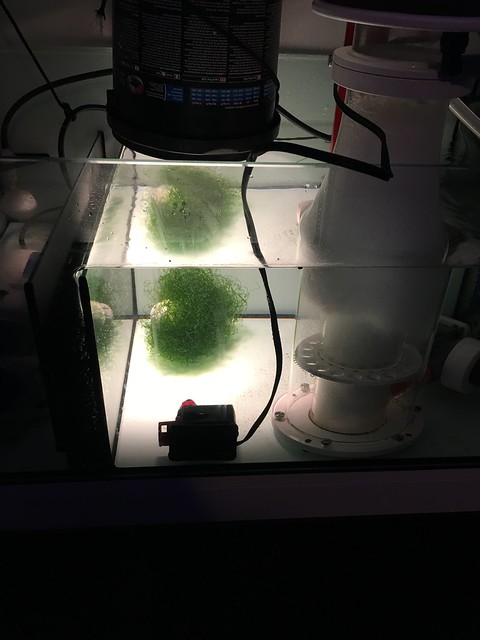
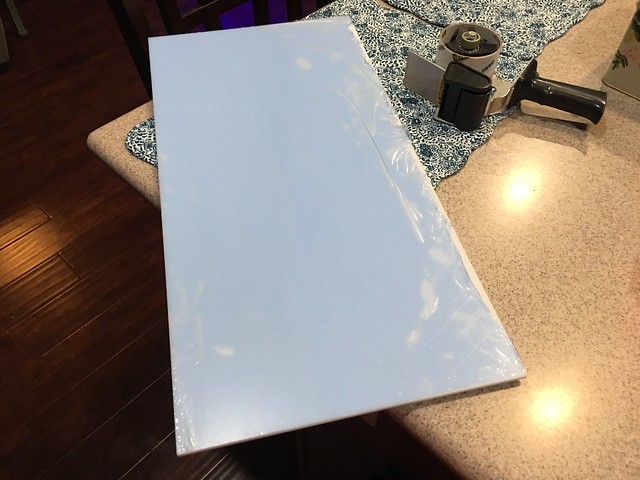
This weekend I got some time to build a small refugium. I ordered up some white 12x24'' 1/4" thick acrylic on eBay for $11.80 :http://www.ebay.com/itm/272066133452?_trksid=p2057872.m2749.l2649&var=570877604929&ssPageName=STRK:MEBIDX:IT

Arrived in 2 days from FL to CA, free shipping!
30093231630_4bde44de7e_z.jpg

Scored the sheet up and cracked it into size. I lost my acrylic glue, so I ended up using my clear PVC glue. Seemed to have a pretty strong bond for what I need.

29758448633_7c1bc67901_z.jpg


Before:

30093232350_3a904b9bce_z.jpg

After:

30304364291_49f25c27c9_z.jpg"


Looking to get some Fiji mud now from BRS:
http://www.bulkreefsupply.com/fiji-mud-refugium-booster-walt-smith.html
Don't suppose u have measurement to makes his do u please
 
As an eBay Associate we earn from qualifying purchases.

"I don't suppose you would have measurements to make the baffle a tight fit do u" that was supposed to say lol
 
"I don't suppose you would have measurements to make the baffle a tight fit do u" that was supposed to say lol

You would want to be careful about having a tight fit with acrylic in a glass sump. CTE between glass and acrylic is different enough that the acrylic will expand more than glass will. This can put pressure on the glass and crack it. This is why when attaching acrylic baffles in a glass tank with silicone, you should give them 0.125" or greater gap on either side for expansion and contraction of the acrylic.
 
You would want to be careful about having a tight fit with acrylic in a glass sump. CTE between glass and acrylic is different enough that the acrylic will expand more than glass will. This can put pressure on the glass and crack it. This is why when attaching acrylic baffles in a glass tank with silicone, you should give them 0.125" or greater gap on either side for expansion and contraction of the acrylic.
So how would one get a water tight enough seal to be able to use it efficiently as a baffle
 
So how would one get a water tight enough seal to be able to use it efficiently as a baffle

Adding it as a baffle after the fact would be difficult unless you make it a tight fit. But then you run the risk of stressing the glass. One idea is weather stripping. Silicone weather stripping that slips on maybe. Or run a bead of silicone on the edge of the baffle and let it dry.


 
Looking good! I keep thinking I want a large water storage container...haven't pulled the trigger yet.

I highly recommend it. I wish I had the container msab is using. I bought one of those 55 gallon blue drums and then put a BRS ABS threaded bulkhead on it. Had to cut the top off to secure the bulkhead. But it's worth it. Having a ready available source of RO/DI water whenever I need is so much better than waiting for a 5 gal bucket to fill up.
 
"I don't suppose you would have measurements to make the baffle a tight fit do u" that was supposed to say lol

I don't but I can try and measure them while they are under water.

From the inside of the glass baffle to the inside of the acrylic baffle is (so the fuge area) is 7 1/8".

The width of the baffle(back wall to front door opening.. the main piece that the water flows over) is about 16.5". This will probably vary per glass sump. I left about 1/16" of space so the acylic could expand and not add pressure to the width of the sump.

10" tall (from bottom of sump to out of the water). The higher you go the more water pressure against it. As well as higher water level at the filter sock area.
Image1486437218.562385.jpg
.

The most important part I think is to grind down the sharp corners so they don't stab into the silicone.
Image1486436601.412164.jpg


The small amount of sand holds it in place when the return pump is off. Really the small square support that I added in the middle is holding most of the pressure of the water. I added the small supports on top just to prevent it from warping over time. Remember not to mount the arms at the very top.
Image1486437331.378989.jpg


I run my M1 pump higher than most at 2 leds off at the top end. So the water is moving pretty good in there.

Let me know if you need anything else!

Image1486437004.617353.jpg
 
You would want to be careful about having a tight fit with acrylic in a glass sump. CTE between glass and acrylic is different enough that the acrylic will expand more than glass will. This can put pressure on the glass and crack it. This is why when attaching acrylic baffles in a glass tank with silicone, you should give them 0.125" or greater gap on either side for expansion and contraction of the acrylic.

Yup I agree! Don't make it a super tight fit. It almost floated backwards when the pump is turned off is how loose it is. I added the sand and that keeps it in place. So far the sand has not made it between the glass and acrylic.

I did a lot of reading though and people were saying that acrylic and silicone don't have much bonding strength compared to glass. I guess the bead of silicone on both sides would keep it in place though. Ideally it would be best to just add a glass baffle, but I needed something cheap and quick.
 
Looking good! I keep thinking I want a large water storage container...haven't pulled the trigger yet.

Well when you do, Boyd's in Texas have the best shipping rates I could find. Make sure you call them cause they get you a better rate than their website!

I am using the RO/DI waste water right now to rinse it out. Its also helping me slowly test out the total weight on the shelf in case I need to add more support. I am about half way there and it is solid so far!
Image1486438447.049164.jpg


I almost want to get another storage tank now to capture the RO/DI waste water and use it to wash cars or something with this drought in CA. Not too sure if plants like soft water.
 
Image1486439407.002380.jpg

20 gallon white food grade Brute container arrived today from Amazon! Next I need to get it some wheels and a lid.
 
71965d7f0e36c7fd0bbde8b85e24cb1a.jpg
e95321ad84de3591a0ca1fd6d917fa90.jpg
a87d2d937be16b346c912149b9253415.jpg
739f2e477b7db97d0eedccf1d57aa43b.jpg


Quick update. I picked up the Neptune ATK from BRS. Delivering 1-2 gallons of water to the tank a day to the ATO container was becoming a full time job. I was going to try and run the ATK in stand alone mode since I am limited on connected modules from the JR. I ended up sacrificing my keypad to add it in. I used Cat5e cable to extend the pumps cable. After getting this all installed its made the hobby much more enjoyable.


I also rigged up the biopellet reactor. I started off slow with half the amount. I don't have much in the tank so I had a bit of cyano overtake. After removing some pellets I have gotten it down to 99% contained. Right now I am running about 1/4 the recommendation.
71965d7f0e36c7fd0bbde8b85e24cb1a.jpg
 
8ee70ee344d505e94d0c8fcd8c835f4e.jpg


Next project is cleaning this mess up. Maybe even before MACNA.
 
I have also plumbed the skimmer to fresh air outside. My pH now hovers more around 8.4 vs 7.9-8.0. One quick lesson learned is disconnect it on the 4th of July. All the corals were closed up and the tank water had a green tint to it. Luckily by the AM everything cleared up after being disconnected over night.
9ad3435bfbb0e93d4b658610cf3cc439.jpg
a4ed73fa9755403e167bed22a236205b.jpg


I also picked up a Netatmo to keep an eye on the indoor humidity and CO2 levels in the house.
5b41e0f08079f2167e9c908d80bbf667.png
d4a62a3701e289a32bbe9b7151243176.png
8ead0f9400b45ba8de71064950660285.png


I plan to also automate via IFTTT some exhaust fans in the house to kick on when the levels reach a particular set point.
 
I've had enough! My skimmer cup flooded the other day and soaked everything. My clowns laid eggs again and it upset my skimmer. I gave in and purchased a Davy Jones' Skimmate locker from Avast Marine. Thanks for the free shipping Avast! You guys are awesome! I cant wait for it to get here.
 
Some updates, Avast skimmate installed and after a week or so this is the results:

8b853ae552eaba62dd1497632ceabfa7.jpg
3aa1ace740d26fbb923d3c33025075d0.jpg
 
Planning on cleaning up the control center now. I am starting to plan it out:
564d3a61a3d72f5a563345ca8210bcf8.png

2642e8ab65654059e38befd382b8cfab.png

5c480f38a7bcc6e4befc03b93446fd0b.png
4832c98136d02c74142d232f50589c93.png


Pink objects will be a fan and fan controller in white:
03b80107b8e4ef5be8744f2634959ef6.png

1117b8ae9353896f4d3e8da79b326177.png


I plan on getting 2x2 inch wiring duct in white which is in blue in the diagram:
27001afbd3bb348c03549c659a86e5f3.png
 
Last edited:
I am also working on updating the tank lighting with 3-4 Radion XR15 G4 Pros. I really like the design of the Red Sea Peninsula. I am starting to model one up now. Probably make it out of wood. I am waiting on one to come in this week so I can get better measurements and plan out how it will be powered. I would like to have the power somehow come from the ceiling but still be a very thin cable:

64f73cf92bc0fdc3357c825e9888c8d6.png
2902a4c4c100980a9669e49625856cf5.png
27f06e8fd9527f1b6166e5f027aad6fe.png
 
Last edited:
I found powered suspension cables! GripLock systems makes the cable and its called the "Solimar".
 

IF YOU HAD TO TAKE A REEFING EXAM, WOULD YOU PASS?

  • Yes!

    Votes: 32 45.7%
  • Not yet, but I have one that I want to buy in mind!

    Votes: 9 12.9%
  • No.

    Votes: 26 37.1%
  • Other (please explain).

    Votes: 3 4.3%

New Posts

Back
Top