


- Joined
- Mar 18, 2017
- Messages
- 175
- Reaction score
- 87
- What state or country do you live in
- Indiana
Already posted this on another thread, but it's gotten a bit off topic. Thought others might find this useful.
I picked up some old AI Vegas a little while back for cheap. After doing some research, it looks like AI no longer supports the upgrade program, and they of course no longer support the Vega, so I decided to find out if I could solder in new LEDs. Unfortunately these aren't as DIY friendly as some lights, but I had some success doing it today with a broken test unit I picked up for cheap using the method in this video.
I can definitively say that it's 100% possible to upgrade and replace individual LED chips on the pucks. I will say, I recommend getting in some practice before you throw good pucks on the heat though. Try flowing them off and on and off and on the stars they come on. When you think you're ready, turn the temperature down lower than you think you need, and work up from there SLOWLY. Aside from that, just know that the positive side can be determined by looking at the back of the chip. It'll have an arrow pointing to one side. The side with the arrow is positive, the side it POINTS TO is negative.
Also, contrary to what I read online, the whites AREN'T XM-L chips on this particular unit. The contact patch on the XM-L2 chip is too big. Use an XP-G3 or XP-E2 here instead. It must have been a version change.
Anyway, I let my heat get too high on the puck I tested, and delaminated my board a bit, which ruins it's ability to transfer heat properly. It still lights up though, and I think I've got my temperature control down pat. I plan on ordering more LEDs to try on the rest of my test unit's pucks. Anyway, here are some pictures.
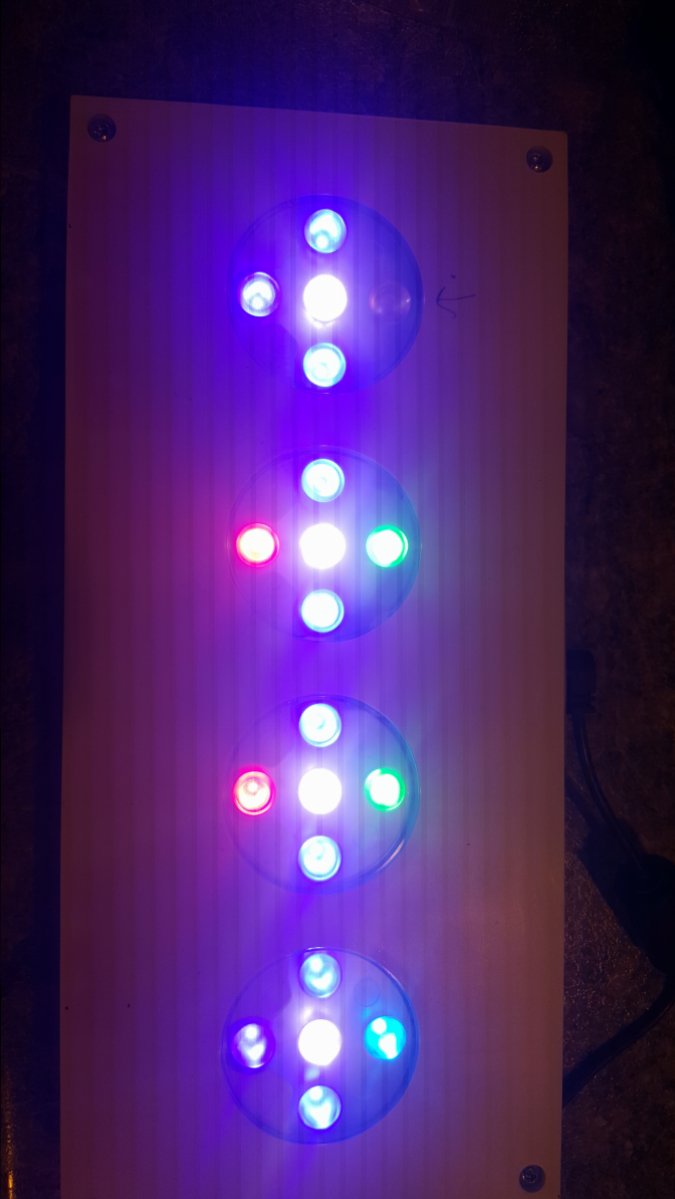
Here is the before shot. I replaced the burnt out LED, one of the Royal blues, and the center white with one of the old royal blues after I realized I'd ruined that section.
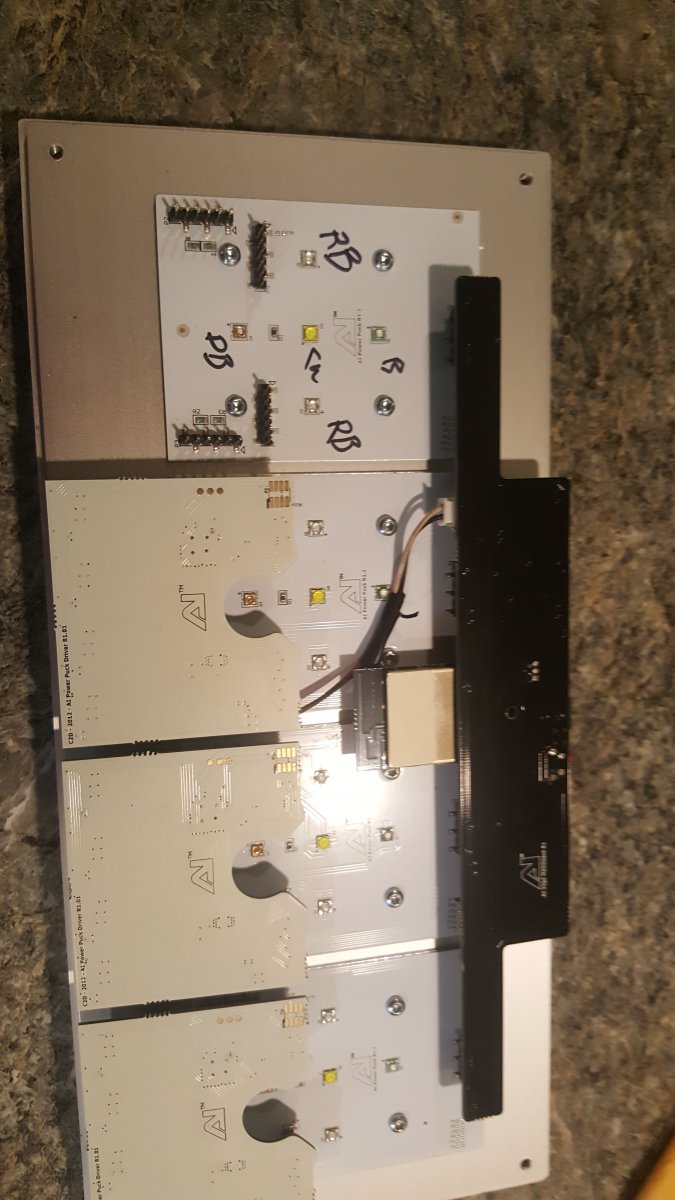
In case you're unfamiliar with what these look like opened up.

The puck and parts

I've got an entirely blue puck now. 1 new xp-g2 royal, 1 xp-e2 blue, and one old xp-e royal that I swapped onto the bubbled white position to see if it still worked
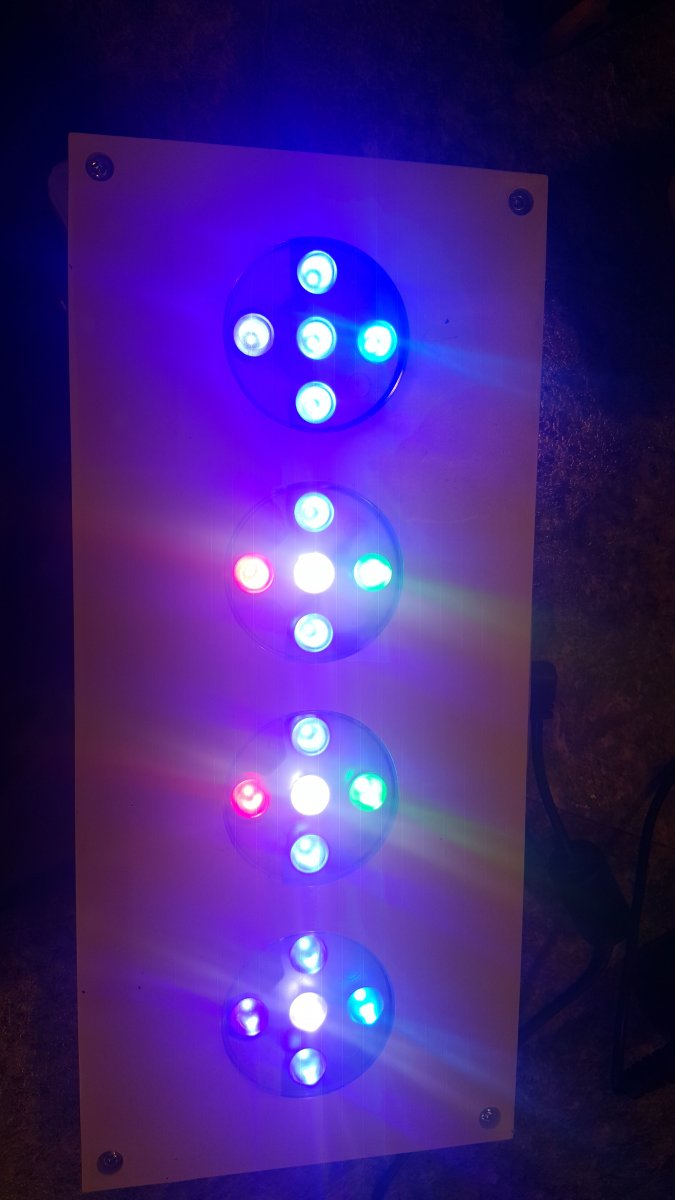
Here it is closed back up. I've got it running in the garage to test it currently.
I just ordered the rest of the LEDs from RapidLED to do the rest of the pucks on the test unit. If all goes well, I'll do my 3 good fixtures.
I picked up some old AI Vegas a little while back for cheap. After doing some research, it looks like AI no longer supports the upgrade program, and they of course no longer support the Vega, so I decided to find out if I could solder in new LEDs. Unfortunately these aren't as DIY friendly as some lights, but I had some success doing it today with a broken test unit I picked up for cheap using the method in this video.
I can definitively say that it's 100% possible to upgrade and replace individual LED chips on the pucks. I will say, I recommend getting in some practice before you throw good pucks on the heat though. Try flowing them off and on and off and on the stars they come on. When you think you're ready, turn the temperature down lower than you think you need, and work up from there SLOWLY. Aside from that, just know that the positive side can be determined by looking at the back of the chip. It'll have an arrow pointing to one side. The side with the arrow is positive, the side it POINTS TO is negative.
Also, contrary to what I read online, the whites AREN'T XM-L chips on this particular unit. The contact patch on the XM-L2 chip is too big. Use an XP-G3 or XP-E2 here instead. It must have been a version change.
Anyway, I let my heat get too high on the puck I tested, and delaminated my board a bit, which ruins it's ability to transfer heat properly. It still lights up though, and I think I've got my temperature control down pat. I plan on ordering more LEDs to try on the rest of my test unit's pucks. Anyway, here are some pictures.
Here is the before shot. I replaced the burnt out LED, one of the Royal blues, and the center white with one of the old royal blues after I realized I'd ruined that section.
In case you're unfamiliar with what these look like opened up.
The puck and parts
I've got an entirely blue puck now. 1 new xp-g2 royal, 1 xp-e2 blue, and one old xp-e royal that I swapped onto the bubbled white position to see if it still worked
Here it is closed back up. I've got it running in the garage to test it currently.
I just ordered the rest of the LEDs from RapidLED to do the rest of the pucks on the test unit. If all goes well, I'll do my 3 good fixtures.
Last edited:























